Showing posts with label Ohio. Show all posts

Sunday, April 2, 2017

FORK IN THE ROAD

The Fiero EV project has been a great experience filled with ups and downs over the last 5 years. My dream was always to take a build to EVCCON and that dream came true in 2015, although the event was actually canceled and only a scaled down version was held. 

My original thoughts were to purchase a lead acid conversion and just add the lithium batteries but that path went to the wayside when the original Curtis controller blew up, just as I was ready to start working on the Fiero.

Now I am faced with a fork in the road as after the Synkromotive controller caught on fire, I am really back to square 1! One lesson learned was that you do not want to do a build with old technology. When the Fiero was purchased, most conversions used DC motors and the HPEVS three phase motors were just being introduced. Prior that the introduction of this motor, AC motors and controllers were a very costly proposition. Now with the HPEVS motors and re-purposing of OEM motors, companies like EVNETICS and Synkromotive have ceased producing DC controllers for EVs.  


FORK IN THE ROAD

EVTV is offering a Siemens motor and air cooled DEMOC controller for around $1500, but just as the original purchase of the Fiero, this is old technology and is quickly being replaced by much lighter and more efficient motors and controllers. The Siemens motor is 190 lbs and the DEMOC controller is 60 lbs. That would be an increase of almost 120 lbs over the DC set up currently in the car using basically obsolete components.


AIR COOLED DEMOC


SIEMENS MOTOR

Couple this with the fact that used OEM EVs depreciate rapidly and are being resold at a fraction of their original price leaves one with the decision of whether to convert or pick up used OEM EV that still has a battery and drivetrain warranty. Currently a Fiat 500 E can be purchased on ebay for between $5000 and $6000. Decisions.....decisions!


FIAT 500 E

Between better motor/controller efficiency and lighter, more powerful, and safer battery technologies, does it really make sense to put the Fiero back on the road with the currently available components. Also, I am more of a mechanic and do not do well with the programming portion of the currently available OEM component technology, so struggle even pulling up a terminal session to set the parameters.  

With all of that said, the Fiero EV was still a fun and functional car to drive and with the 2 Better Place modules that were installed, had a good 50 mile range when driven moderately. So the question becomes, do I sell the car with the battery module for a little over the cost of the battery modules or dive back in and get it back on the road?
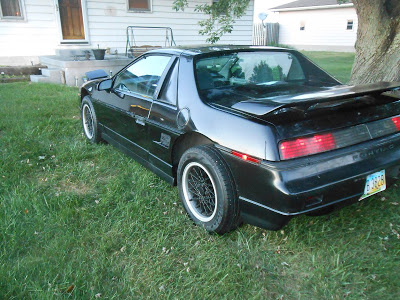

THE FIERO EV

If any of you have any input, I would be glad to hear from you.

Until next time,

Randy

Sunday, February 28, 2016

THIRD TIMES A CHARM???

This is the third Better Place Module that I have had the privilege to bottom balance and must admit, after seeing the aftermath of the fire at EVTV, am being a bit more cautious. When bottom balancing the Better Place Modules, they are always on  a furniture dolly, so they can be quickly wheeled out into the driveway should anything go wrong.

As I described in my last post, the process is started by finding the lowest cell and then hooking up two 1000 watt halogen flood lights and bringing them down until the lowest cell is 2.9 volts. The lights are then disconnected and another voltage reading pass is taken to make sure that is still the lowest cell. The volt meter is then moved to the new lowest cell or left as is, if that is still the lowest cell. Then a 40 watt light bulb is used to draw the cell voltage down to 2.75 volts. Once the cell is down to 2.75 the light bulb is turned off and another voltage pass is taken to make sure that is still the lowest cell. Then a 5 watt light bulb is connected to the module and left on until the lowest cell comes back down to 2.75. This is the stage I am currently in, as once the 5 watt bulb is connected, the voltage starts coming  back up and often goes close  to 3 volts before it starts coming down again. I started this yesterday morning and after 25 hours of discharging, still do not have the low cell stabilized to 2.75 volts.

When the cells are drained, they seem to always drift back up but when they are charged seem to always drift back down in voltage, so once I get the low cell down stabilized at  2.75 volts, I start charging them all back up to 2.8 volts or what ever voltage the highest half cell is resting at. Remember, the Better Place cells are LiMn2O4,  not LiFePo4 cells and operate at a higher voltage range, so when they are down to 3 volts per half cell, are pretty much depleted. My controller is set to cut off at 90 volts or around 2.8 volts per cell, so the module should never discharge lower that that.

While the module is being discharged, a post it note is stuck to my laptop to remind me and I check the module every half hour or so. I have found that since the LiMn2O4 cells are so "bouncy," the best way to get them to stabilize below 3 volts is to discharge at a very low level when approaching the desired low voltage.

Also, measurements were taken in the nose of the Fiero and the module will fit, so am thinking about how to mount it. To get the module in from the top, the hood will need to be removed but this may be the best way to install it.

Until next post,

Randy

Saturday, February 27, 2016

BOTTOM BALANCING THE LAST BETTER PLACE MODULE

We have had a few nice weekends in the last half of February, so decided to start bottom balancing the third Better Place battery module. 

The terminals and connectors were  all cleaned with scotch bright and a thin coat of Noalox anti-oxidant compound was applied to the them. The connectors were positioned on the terminals and a small drop of Loctite was applied to each of them before threading them into the terminal. A socket on a Dewalt drill with the torque setting on 3 was used to tighten all of the terminals.  

Then voltages were taken on each half cell and most of them were in the 3.85 volt range but one cell was only 3.65, so the volt meter was hooked on that half cell to monitor the drain down of the module.

Eye terminal connectors had been previously crimped onto the end of an extension cord and two 1000 watt flood lights are used to draw down the module. When the voltage reading on the lowest cell approached 3 volts, the individual half cell readings will be taken again and a different cell will be monitored if necessary. I will drain the module down to 88 volts or 2.75 volts/half cell and let the module set for awhile, as it will drift back up in voltage in a few hours. Then a 100 watt light bulb is hooked up to allow the voltage to be drawn down slowly. Finally a 5 watt night light is hooked up that allows the voltage to be drawn down even more slowly. This is the only way I have found that will cause the voltage to finally stabilize and not keep drifting back up. Even after that, over a couple of weeks, the cells will drift back up to around 3 volts. 

After the initial draw down and couple of weeks sitting, individual half cell balancing is done with a JLD404 and a 4 volt flashlight bulb. The JLD404 is set so it drains the half cell down to 2.75 volts and does not turn back on until the cell drifts back up to 2.95 or so. These are just hooked up and allowed to cycle until the half cell stabilizes under  2.95 volts.


BOTTOM BALANCING MODULE


With spring just around the corner, I want to get a running start to get the Fiero back on the road with all three modules installed.

Thanks for visiting,

Randy

Sunday, February 14, 2016

PARTING WITH MY MIATA

A hundred thousand miles ago, I purchased a 1989 Miata with 75,000 miles on it from EBAY. After a flight to Philadelphia, and a puddle jumper to Allentown, PA, I was on my way back to Ohio. After driving a few miles I noticed a strong smell in the car and as the previous owner had recently passed, wondered if it wasn't in the car. Half way home the clutch quit working but was able to put in some more fluid and make it home.

Turned out the fender drains were plugged and water from the convertible top drains into the fender wells then exits through the drains. The slave cylinder on the clutch had to be replaced but after that, the car was great. You normally drive down a road in the summer with the air on but in the convertible, you could smell freshly cut grass and the sweet smell of wild flowers.

When EVTV had their Build Contest before the first EVCCON, my entry was the Miata, using rear drive, single speed transaxle, AC motor. I didn't win but did drive the Miata to Cape Girardeau for the first four years. The car was just sitting in the driveway and had an overheating problem that I just couldn't seem to isolate. Then the window regulator broke and the drivers side window would not go down. Instead of letting it sit in the driveway and pay insurance on it, just seemed that selling it was the right thing to do, so it was listed on Craigslist.

I received several inquiries but finally got one from a guy in my area who wanted to come and look at it on the weekend. We have been experiencing some of the coldest weather the last several days, so when I went out Saturday morning to get the car running, I had problems getting the trunk open to try and charge the battery. Ok, finally got it open and hooked up the charger, so several hours later, had the same problem getting the door open to try and start the car. Finally when in the car, nothing! The battery was removed and taken back to Autozone where I had purchased it and after fumbling around with it for a few minutes, the salesman said "Yep, she's toast!" Fortunately, it was still under warranty, so walked out with a brand new battery. Once the battery was in the car turned over smoothly and started, for about two seconds, then just puttered. Ok, it was cold out and car had not been started in months, so decided to put a heat gun under the hood to try and warm the engine up a little. No surprise, the hood would not open, so after cleaning as much snow and ice off of the hood as was possible, was finally able to pry it open and get the heat gun under the hood. After going inside to get warm for about a half hour, I tried to start the car again. This time it started for about 30 seconds, then puttered out. After a couple of tries, the engine finally kept running and after idling about 15 minutes, took it down the road for my last drive. Upon returning, I pulled it in the garage and by the time the potential buyer got here, had most of the snow and ice off of the car.

After the usually tire kicking and dickering back and fourth on a price, we came to agreement and the Miata was gone.


1989 MIATA

So long to the Silver Bullet!

Randy

Friday, February 12, 2016

MORE ZOMBIE 222

I have been following Mitch Medford's quest to break 200 mph at the Texas Mile and ran across his new YouTube series on installing new Voltbox battery modules. The modules use A123 Lithium Iron Phosphate battery cells and are rated at .98KW/module.


Standard energy module
Rated voltage: 12.8V
Capacity: 0.98kWh
Weight: 10.4kg
Dimensions (inch): LxWxH: 
approx. 11,1 x 3,5 x 10,16


Good luck to Mitch in his quest to break 200 mph!

Randy

Sunday, February 7, 2016

GORGEOUS DAYS!

Here we are on the seventh of February and the weather over the weekend has been spring like, here in central Ohio but no work was done on the Fiero. The new rubber wheel well splash shields from the Fiero Store arrived a couple weeks ago but just didn't have the motivation to put them in yet. I did move the car to do a little paint work on the Mercedes SLK 230 headliner trim pieces but that is about the extent of messing with it.

Even though my posts have been down, the hits on the blog were up in January and are already at 106 views for February. Thanks to all of you who have been following this build and I promise, the posts will pick up in March.

Currently, new equipment is being gathered to be able to do some drive videos and I am really shooting for getting the third module installed so the car can be driven the 22 miles to work. Several of my co-workers have been interested in seeing the conversion but I want the car to be working and look as good as possible before showing it. Hopefully by early spring it will be ready for prime time!

Inside EVs ran an article titled "President Obama Proposes $10 Per Barrel Tax On Oil In Push For Cleaner Transport" and it is ironic because if any of you follow EVTV, Jack Rickard laid out a very similar plan to tax gasoline, starting with $.25/gallon and gradually raising it over the next 5 years. Now I am not advocating raising taxes and the chances of passing a bill to raise taxes on oil would be slim to none, but it would be a way to fund clean transportation and give additional incentives  for the public to try an alternate fuel vehicle. 

Well, got my EV fix out of the way for this week, so back to the Superbowl. Thanks for visiting and don't forget to leave a comment.

Randy

Sunday, January 24, 2016

COOL TWIN MOTOR SETUPS

Not much going on with the Fiero build but while scanning Facebook, came across a very cool twin motor setup that would look very good in a hot rod build.


Also found a very clean looking dual AC motor set up that EV West put in  a VW van.


Spring is not that far away, so am looking forward to getting back to work on the Fiero!

Randy

Sunday, January 10, 2016

FIRST SNOW

This winter has been unseasonably warm so far and last week the temperature reached 50 deg one day but finally Old Man Winter is catching up with us! 


FINALLY, SNOW IN CENTRAL OHIO

With the holidays, not much progress has been made on getting the voltage and amp meters finished and the interior put back together on the Fiero but today, new splash shields were ordered from the Fiero Store, for the engine compartment. 


ENGINE COMPARTMENT SPLASH SHIELDS

A bluetooth keyboard and mouse were purchased for the Dell Venue 8 Pro, so while the center console is out of the car, may change the tablet mounting so the keyboard can be incorporated and also to raise the tablet high enough so the camera will clear the dash to get video of drives.


BLUETOOTH KEYBOARD AND MOUSE

The garage is cold, so I have been spending most of my time working on getting parts and developing a plan for work on the Fiero when the weather breaks. Below is a picture of me sitting by the computer with my build assistants Apollo (cat) and Chloe (dog.)


ME AND MY BUILD ASSISTANTS 

Thanks for visiting,

Randy

Thursday, December 31, 2015

2015 BUILD REVIEW (SECOND HALF OF THE YEAR)

By the middle of August, the battery modules had been matched and connected together in parallel. In addition, a TCCH PFC-3000 charger was installed and the car was driven fellow EV builder, Brian Couchene's house, the longest distance the car had been driven to date. Brian's  father was visiting, so we took a ride up and down the hilly roads nearby . The Fiero was actually able to climb the steep grades in fourth gear, which was very impressive.


08/02/15

By the beginning of September the Fiero was pretty much ready to take to EVCCON, the plastic side trim and lower bumpers were sanded and painted satin black, and the car was professionally detailed.


SEPTEMBER 9, 2015

Shifting was still erratic, so a set of new bushings were ordered for the shift lever from Rodney Dickman. The instructions clearly stated to be careful not to break the aluminum shift bracket but the pin would not budge and finally when I thought it did, found that the shift bracket had snapped. This was not good, with only a few weeks until EVCCON the transaxle could not be shifted. I got on Thumb Tack, found a couple of welders in my area and finally talked one of them into welding the shift bracket on short notice. The job was a very professional and sturdy fix, so i was able to get the shift linkage hooked back up. The new bushings took the play out of the shift bracket but shifting was still erratic and seemed to come out of adjustment after a few shifts. 


SEPTEMBER 16, 2015

The last improvement made before EVCCON was a new vacuum pump. The one that came with the car was very noisy but I found a smaller one that is rather quite and operates the power breaks just fine.


SEPTEMBER 21, 2015

A week before EVCCON, Jack Rickard announced it was canceled this year because he could not secure insurance for the venue. Shortly after the announcement, it was announced that there would still be an open house at the EVTV Garage for anyone interested in still making the journey. Tuesday morning, September 29, 2015, Brian Couchene arrived at my house with his tow dolly, the Fiero was loaded, and we were off to EVCCON!


SEPTEMBER 30, 2015

Upon returning home from EVCCON, I went to work on all of the problems that turned up from driving the Fiero around Cape Girardeau for a week. The right side instrument lights were not lighting up and the 12 volt digital meter in the instrument panel quit working so a new instrument cluster was purchased, along with a new ignition switch.


OCTOBER 7, 2015


By the end of November, the instrument cluster was finally rewired using a D-Sub connector for the digital volt/amp meter wiring, and was ready to be installed in the Fiero. The steering column had been dropped and the new ignition  switch was installed.


NOVEMBER 29, 2015

By the beginning of December, the instrument panel was back in the car with the lights and meters working.


DECEMBER 13, 2015

So this is pretty much the year in review, pretty much right back where I started. With the weather finally turning cold, there will probably not be much more progress until spring. The guys at work are wanting to see the car but I do not want to chance driving it into Columbus, OH until the third module is installed, just in case I am not able to charge at work. While the interior is torn apart again, I will remove the passenger seat to paint the frame work and to pull off the interior panel so the light switch on the door can be replaced.

Thanks for visiting my blog this year!

Randy

2015 BUILD REVIEW (FIRST HALF OF THE YEAR)

It is ironic that 2015 started with wiring the console and actually ended with that also. After you start driving the conversion, you always find things that you are not satisfied with and end up having to go back and rework them. I guess this goes back to your original engineering and planning, so this will go down as a  lesson learned for future builds.


JANUARY 3, 2015

By the end of March, the interior was finally back together and actually turned out pretty good. The heater controls were wired to be able to turn the heat on and off with the temperature slider, the Venue 8 Pro tablet was mounted to be able to view the Synkromotive Motor Controller user interface, and all of the meters were reading properly.


MARCH 29, 2015

By early May, I had installed LED dome, instrument and headlight lamps to help cut the power required to drive at night and I must say, was rather impressed with the LED headlamps.


MAY 9, 2015

By the middle of May, the Fiero could be driven and with one of the Better Place modules, had around a 25 mile range using 251 watt hours/mile.


MAY 12, 2015

As a precaution, a JLD 5740 meter and ABB contactor were installed to be able to disconnect the 240 volt AC power to the charger when the charge reached a predetermined level. This was just to give me a little piece of mind that if the charger control did not turn off or tried to float charge, the ac power would be cut off to it.


MAY 31, 2015

Side panels and a floor were fabricated to enclose the front trunk compartment and the second module was modified and mounted in the front of the car before conduit was mounted under the car to protect the power cables. The second module was finally installed, effectively giving me a 50 mile range.


JULY 31, 2015


Sunday, December 13, 2015

VOLTAGE BUT NO CURRENT

Sunday after a little wire swapping, the pack voltage started reading on the meter, but not the voltage. Not sure what is happening here but on the old meter set-up both the voltage and current were reading on the pack. The problem was the dc-dc converter wire had come off on the 12 volt meter and it no longer was powering up. Now I can get a voltage reading on the 12 volt meter but the current still reads zero. When these meters were out of the car, I should have hooked them up on the test bench and made sure I knew what each wire was. I would recommend if you purchase any of these, you stick with the same model if you are using more than one and test them on the bench before installing as the documentation sucks!


METERS READING VOLTAGE

Ok, if the meters aren't enough of a problem, as I stated last week, the dome light dims but stays on when the doors are closed. After reading several blogs, I checked all of the door switches but when operating the passenger side switch, while letting it snap open, broke the plastic plunger that protrudes through the door jam, so now the dome lights just stay on all the time. This is bad news, as it means the passenger side panel will need to be removed. To remove the side panel, the seat will probably need to come out. It seems like every time something is fixed, something else gets broken. 


PASSENGER SIDE DOME LIGHT SWITCH

Eventually I will get everything working but am certain the mild days are running out this winter. My garage is small, so it is much easier to work on the Fiero outside and it is discouraging that when one problem is fixed, another crops up causing me to have to disassemble the interior further. 

Until next time,

Randy 

Sunday, December 6, 2015

GLOBAL WARMING

As gas prices have been falling, (Currently $1.79 in my area of Ohio) the other reason to own an electric car is to help the environment. It is December 6 and warm enough to work outside on the Fiero in a sweatshirt. Ok, so maybe there are some benefits to a warming climate! You know I am just joking but it was a beautiful December day in Central Ohio! The nights have been cold with frost in the morning but by about 10 am, the temperature is in the high 50s, so I was able to get a little more work done on the Fiero instrument cluster both Saturday and Sunday.

The final 3 wires were spliced on the D-Sub connector and after a little fumbling around trying to remember how it went into the housing, was finally able to get it back in the car and plug in all of the connectors. The duel meters light up but are just reading zeros. These duel volt/amp meters are inexpensive but are produced in China with very poor documentation, so on the pack meter (I checked to make sure there was voltage before I made the connections) the negative and positive must be switched. I did not check the 12 volt lead voltage on the low voltage meter, so I suspect that is the problem on that one. Even though the faces of the meters look the same, the connections on the back are different and I have read in some of the forums that even the same model meters sometimes do not have the same connections from batch to batch. I am getting closer so hopefully someday, the meters will work correctly and actually read volts and amps! The good news is the speedometer lights are working, but on the downside, now my dome lights are not shutting off when the doors are closed and the parking brake light stays on all of the time. Did I ever mention I hate automotive wiring!


INSTRUMENT LIGHTS WORKING!

Every weekend day that is warm enough to work out side is a true blessing but I know this will not happen much longer, so really need to get all of the Fiero lighting and metering working soon. 

My wife had been bugging me to get her SLK 230 headliner recovered and stopped into JoAnn Fabrics to find out if they carry any headliner fabric. To my surprise, they did but I also found some black vinyl that had a really cool pattern in it that I may try. I think it would be easier to clean and would give the car interior a classy look, so may just stop back and pick some up.

Until next time,

Randy

Sunday, November 22, 2015

OH NO......SNOW!

There is always a day in spring when the weather breaks and work on the Fiero can be done outside but on the other side, a day in the fall when the car has to be  pulled back into the garage to continue; Today is the latter.


SHOW ON THE PORCH RAIL

The instrument panel was assembled and some final tests were being done on the d-sub connector, that is being used, when the ends of the test leads touched each other, while checking voltage between pins. One of the pins was vaporized and the wiring connections under the center console were damaged. When the center console connections were uncovered, one side was badly blackened. Currently new wires are being run under part of the console that can not be accessed.

Another problem is that while the meters being used are the same size, they are made by different manufactures, meaning the shunt and voltage pins are different on each of them. When making up the d-sub connector for the external wires, care must be taken to connect the correct external wire to the correct wire going to the meter, as the plugs for the different meters look the same but the reading actually goes to different pins on the respective meters.


WR-005 METER

    
YB27VA METER


DIFFERENCE IN PLUGS

When reading other blogs, a great amount of respect is growing for these builders. One builder in particular is Fred Behning. He too is reworking his instrument panel  and with the level of complexity involved, completed it in record time. You can take a look at his work in his blog post: 


A Pinch of This, A Dash of That


After the Fiero was completed to take to EVCCON, it has been a little hard getting motivated to clean up some areas that don't satisfy me. My wife and had Chinese dinners the other night and the reading on the fortune cookie really struck home.


FORTUNE COOKIE

My posts will probably slow down through the winter but work will continue, so until next time, thanks for following my blog!

Randy 

Sunday, November 8, 2015

IT COULD BE WORSE!

The other day when the meter leads shorted between the pack battery pins on the d-sub connector, I thought it just damaged the connector but when I went out to work on it today, found that there was no voltage on the wires. After taking part of the center console apart, I could see a wire had come off of the console connector. The easiest way to repair it is to just pull some new wires through the center console and reconnect them to the wires going to the meters.

Sometimes I think I have all the bad luck but this morning when checking the EVTV Page for a new show, found that Jack had a battery fire on Saturday in a Better Place Pack. Seems it ran down too low and when he charged it back up, went ballistic! So when things are not going good on my Fiero build, it is always good to reflect and realize it could be worse. I do have Better Place cells, so will need to make sure they do not run down or overcharge.


EVTV FIRE

Until next week,

Randy

Saturday, November 7, 2015

DEJA VU

When the duel volt/amp meters were first installed in the Fiero, I burnt up the DC-DC converters several times and the same with the meters. This time was no different, as I have ordered more DC-DC converters twice but have not had any issues with the meters. I have never been diagnosed but have all of the symptoms of dyslexia! I look at a schematic and then wire the components backwards sometimes, so have gotten in the habit of checking things two or three times before finally soldering or assembling a circuit. I was finally able to assemble the d-sub connector with the 12 volt power and get the meters to light up. A d-sub connector pin crimper was purchased and is working well. If all of the pins are connected to the wires first, then it is easier for me to make sure they are all inserted in the correct positions in the connector housing. The latest connector has just one wire going to the d-sub pin and the two wires were left long enough to be inserted in both of the MTA-100 connector assemblies.


NEW 12 V CONNECTON


NEW D-SUB CONNECTOR CONFIGURATION

Tomorrow the d-sub that I burnt up while trying to read voltage across the pins will be replaced and I am going to use the crimped pins to assemble it. This time, I am going to put electrical tape on each pin after it is crimped to the wire to make sure they do not touch each other. I still need to take voltage readings to make sure to insert the pins into the d-sub connector housing properly but will take proper precautions this time. I really hate having pack voltage coming into the interior of the car but it would need to use either a resister or a circuit to proportionally reduce the voltage going to the meters to avoid it.

Hopefully another post tomorrow,

Randy

Wednesday, October 28, 2015

MOUNTING THE D-SUB CONNECTOR

Since the 12 volt DC-DC converter quit working, another two were ordered from Light Object. While waiting on them to arrive on Friday, I decided to work on mounting the d-sub connector. As the metal on a computer where these connectors are usually mounted is much thinner than the plastic case of the instrument, they would not mount up with the coupling nuts that are typically used. The female connector had to be mounted to the outside of the housing and the holes on it, had to be threaded to 6-32 threads. Then 6-32 studs had to be made from some small brass bolts to screw into the connector holes with nuts installed on the inside of the housing. This should give me a solid mounting of the female half of the connector and will allow me to plug the male half in and then fasten it with two more screws on the outside of the housing. 


TYPICAL D-SUB STANDOFF


OUTSIDE OF THE CASE VIEW


INSIDE OF CASE VIEW

The addition of the screws on the inside of the case will probably require that a little more of the cluster light dividers be trimmed but I am getting closer to having the it all back together and back in the car.

More this weekend,

Randy

Monday, October 26, 2015

NO BODY TOLD ME

Yesterday evening the instrument panel was tested and true to form, the dual panel meters did not light up. Monday after taking my wife to the doctor, I started trouble shooting the wiring and found that the bottom four wires on the female connector were backwards. No problem, just unsolder and put them back in correctly. A couple of the extra male prongs from the crimp d-sub connector were used on a 9 volt dc adapter to plug into the d-sub female connector on the new wiring harness but the panel meters still would not power up. Voltage readings were taken on the exposed metal on the top of the IDC connectors and there was no voltage, so on looking up the IDC  (insulation displacement contact, found that an insertion  tool is required. After looking around the garage I decided to try to use a male spade connector and was able to stand up the IDC connector and after aligning the spade up on the wire, was able to tap it with a hammer until you could actually feel the wire insert into the slot.


2.54 MM to IDC CONNECTOR

Great, time to try again, just wish the guy at Mouser would have told me you needed an insertion tool when he recommended the connector. This time, one meter lit up so the DC-DC converters were switched and sure enough, the other panel meter lit up and must have been damaged when the wires were desoldered. These DC-DC converters seem to be very delicate, so I order them by two so I will always have a spare.


ONE METER LIT

I really wanted to get the instrument panel back in the car this weekend but at least I am getting closer. 

Until next time,

Randy