Below is the presentation on lithium batteries from EVCCON 2014:
Showing posts with label ev. Show all posts
Showing posts with label ev. Show all posts
Saturday, March 12, 2016
BATTERIES, BATTERIES, ADD MORE BATERIES!
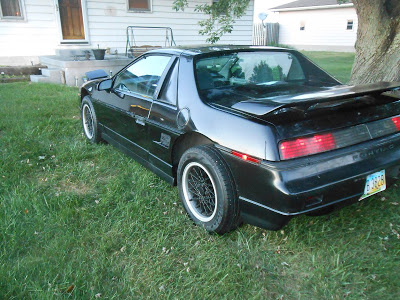
The last Better Place battery module is currently being bottom balanced so it can be synchronized into the Fiero's battery pack and I thought it would be good to show you where I gained my knowledge on bottom balancing lithium batteries.
Below is the presentation on lithium batteries from EVCCON 2014:
Below is the presentation on lithium batteries from EVCCON 2014:
Sunday, February 14, 2016
PARTING WITH MY MIATA
A hundred thousand miles ago, I purchased a 1989 Miata with 75,000 miles on it from EBAY. After a flight to Philadelphia, and a puddle jumper to Allentown, PA, I was on my way back to Ohio. After driving a few miles I noticed a strong smell in the car and as the previous owner had recently passed, wondered if it wasn't in the car. Half way home the clutch quit working but was able to put in some more fluid and make it home.
Turned out the fender drains were plugged and water from the convertible top drains into the fender wells then exits through the drains. The slave cylinder on the clutch had to be replaced but after that, the car was great. You normally drive down a road in the summer with the air on but in the convertible, you could smell freshly cut grass and the sweet smell of wild flowers.
When EVTV had their Build Contest before the first EVCCON, my entry was the Miata, using rear drive, single speed transaxle, AC motor. I didn't win but did drive the Miata to Cape Girardeau for the first four years. The car was just sitting in the driveway and had an overheating problem that I just couldn't seem to isolate. Then the window regulator broke and the drivers side window would not go down. Instead of letting it sit in the driveway and pay insurance on it, just seemed that selling it was the right thing to do, so it was listed on Craigslist.
I received several inquiries but finally got one from a guy in my area who wanted to come and look at it on the weekend. We have been experiencing some of the coldest weather the last several days, so when I went out Saturday morning to get the car running, I had problems getting the trunk open to try and charge the battery. Ok, finally got it open and hooked up the charger, so several hours later, had the same problem getting the door open to try and start the car. Finally when in the car, nothing! The battery was removed and taken back to Autozone where I had purchased it and after fumbling around with it for a few minutes, the salesman said "Yep, she's toast!" Fortunately, it was still under warranty, so walked out with a brand new battery. Once the battery was in the car turned over smoothly and started, for about two seconds, then just puttered. Ok, it was cold out and car had not been started in months, so decided to put a heat gun under the hood to try and warm the engine up a little. No surprise, the hood would not open, so after cleaning as much snow and ice off of the hood as was possible, was finally able to pry it open and get the heat gun under the hood. After going inside to get warm for about a half hour, I tried to start the car again. This time it started for about 30 seconds, then puttered out. After a couple of tries, the engine finally kept running and after idling about 15 minutes, took it down the road for my last drive. Upon returning, I pulled it in the garage and by the time the potential buyer got here, had most of the snow and ice off of the car.
After the usually tire kicking and dickering back and fourth on a price, we came to agreement and the Miata was gone.

1989 MIATA
So long to the Silver Bullet!
Randy
Monday, February 1, 2016
Thursday, December 31, 2015
2015 BUILD REVIEW (SECOND HALF OF THE YEAR)
By the middle of August, the battery modules had been matched and connected together in parallel. In addition, a TCCH PFC-3000 charger was installed and the car was driven fellow EV builder, Brian Couchene's house, the longest distance the car had been driven to date. Brian's father was visiting, so we took a ride up and down the hilly roads nearby . The Fiero was actually able to climb the steep grades in fourth gear, which was very impressive.


08/02/15
By the beginning of September the Fiero was pretty much ready to take to EVCCON, the plastic side trim and lower bumpers were sanded and painted satin black, and the car was professionally detailed.


NOVEMBER 29, 2015


SEPTEMBER 9, 2015
Shifting was still erratic, so a set of new bushings were ordered for the shift lever from Rodney Dickman. The instructions clearly stated to be careful not to break the aluminum shift bracket but the pin would not budge and finally when I thought it did, found that the shift bracket had snapped. This was not good, with only a few weeks until EVCCON the transaxle could not be shifted. I got on Thumb Tack, found a couple of welders in my area and finally talked one of them into welding the shift bracket on short notice. The job was a very professional and sturdy fix, so i was able to get the shift linkage hooked back up. The new bushings took the play out of the shift bracket but shifting was still erratic and seemed to come out of adjustment after a few shifts.
SEPTEMBER 16, 2015
The last improvement made before EVCCON was a new vacuum pump. The one that came with the car was very noisy but I found a smaller one that is rather quite and operates the power breaks just fine.

SEPTEMBER 21, 2015
A week before EVCCON, Jack Rickard announced it was canceled this year because he could not secure insurance for the venue. Shortly after the announcement, it was announced that there would still be an open house at the EVTV Garage for anyone interested in still making the journey. Tuesday morning, September 29, 2015, Brian Couchene arrived at my house with his tow dolly, the Fiero was loaded, and we were off to EVCCON!

SEPTEMBER 30, 2015
Upon returning home from EVCCON, I went to work on all of the problems that turned up from driving the Fiero around Cape Girardeau for a week. The right side instrument lights were not lighting up and the 12 volt digital meter in the instrument panel quit working so a new instrument cluster was purchased, along with a new ignition switch.


OCTOBER 7, 2015
By the end of November, the instrument cluster was finally rewired using a D-Sub connector for the digital volt/amp meter wiring, and was ready to be installed in the Fiero. The steering column had been dropped and the new ignition switch was installed.


By the beginning of December, the instrument panel was back in the car with the lights and meters working.


DECEMBER 13, 2015
So this is pretty much the year in review, pretty much right back where I started. With the weather finally turning cold, there will probably not be much more progress until spring. The guys at work are wanting to see the car but I do not want to chance driving it into Columbus, OH until the third module is installed, just in case I am not able to charge at work. While the interior is torn apart again, I will remove the passenger seat to paint the frame work and to pull off the interior panel so the light switch on the door can be replaced.
Thanks for visiting my blog this year!
Randy
Sunday, December 13, 2015
VOLTAGE BUT NO CURRENT
Sunday after a little wire swapping, the pack voltage started reading on the meter, but not the voltage. Not sure what is happening here but on the old meter set-up both the voltage and current were reading on the pack. The problem was the dc-dc converter wire had come off on the 12 volt meter and it no longer was powering up. Now I can get a voltage reading on the 12 volt meter but the current still reads zero. When these meters were out of the car, I should have hooked them up on the test bench and made sure I knew what each wire was. I would recommend if you purchase any of these, you stick with the same model if you are using more than one and test them on the bench before installing as the documentation sucks!


METERS READING VOLTAGE
Ok, if the meters aren't enough of a problem, as I stated last week, the dome light dims but stays on when the doors are closed. After reading several blogs, I checked all of the door switches but when operating the passenger side switch, while letting it snap open, broke the plastic plunger that protrudes through the door jam, so now the dome lights just stay on all the time. This is bad news, as it means the passenger side panel will need to be removed. To remove the side panel, the seat will probably need to come out. It seems like every time something is fixed, something else gets broken.

PASSENGER SIDE DOME LIGHT SWITCH
Eventually I will get everything working but am certain the mild days are running out this winter. My garage is small, so it is much easier to work on the Fiero outside and it is discouraging that when one problem is fixed, another crops up causing me to have to disassemble the interior further.
Until next time,
Randy
Sunday, November 29, 2015
BACK ON TRACK
With the Thanksgiving weekend here, I was hoping to actually get the instrument cluster back in the car but with traveling to my parents and helping the wife clean the house, just didn't get that far. The instrument cluster has been rewired and assembled though and all that is left is to rewire the power leads inside the car.

METERS ILLUMINATED

D-SUB CONNECTOR ATTACHED
If I can get a warm evening or weekend, the interior wiring will be able to be completed and the instrument cluster can be installed and once this is completed, there is a little bid of interior work to do then think the focus will turn to eliminating the power headlights. There is an older Buick headlight assembly that will fit into the opening and then a Lexan cover is made to cover the opening and act as the lens. This will give the car a better look and eliminate the power headlight intermittent operation problem.
Until next time,
Randy
Saturday, November 7, 2015
DEJA VU
When the duel volt/amp meters were first installed in the Fiero, I burnt up the DC-DC converters several times and the same with the meters. This time was no different, as I have ordered more DC-DC converters twice but have not had any issues with the meters. I have never been diagnosed but have all of the symptoms of dyslexia! I look at a schematic and then wire the components backwards sometimes, so have gotten in the habit of checking things two or three times before finally soldering or assembling a circuit. I was finally able to assemble the d-sub connector with the 12 volt power and get the meters to light up. A d-sub connector pin crimper was purchased and is working well. If all of the pins are connected to the wires first, then it is easier for me to make sure they are all inserted in the correct positions in the connector housing. The latest connector has just one wire going to the d-sub pin and the two wires were left long enough to be inserted in both of the MTA-100 connector assemblies.

NEW 12 V CONNECTON

NEW D-SUB CONNECTOR CONFIGURATION
Tomorrow the d-sub that I burnt up while trying to read voltage across the pins will be replaced and I am going to use the crimped pins to assemble it. This time, I am going to put electrical tape on each pin after it is crimped to the wire to make sure they do not touch each other. I still need to take voltage readings to make sure to insert the pins into the d-sub connector housing properly but will take proper precautions this time. I really hate having pack voltage coming into the interior of the car but it would need to use either a resister or a circuit to proportionally reduce the voltage going to the meters to avoid it.
Hopefully another post tomorrow,
Randy
Wednesday, October 28, 2015
MOUNTING THE D-SUB CONNECTOR
Since the 12 volt DC-DC converter quit working, another two were ordered from Light Object. While waiting on them to arrive on Friday, I decided to work on mounting the d-sub connector. As the metal on a computer where these connectors are usually mounted is much thinner than the plastic case of the instrument, they would not mount up with the coupling nuts that are typically used. The female connector had to be mounted to the outside of the housing and the holes on it, had to be threaded to 6-32 threads. Then 6-32 studs had to be made from some small brass bolts to screw into the connector holes with nuts installed on the inside of the housing. This should give me a solid mounting of the female half of the connector and will allow me to plug the male half in and then fasten it with two more screws on the outside of the housing.

TYPICAL D-SUB STANDOFF

OUTSIDE OF THE CASE VIEW

INSIDE OF CASE VIEW
The addition of the screws on the inside of the case will probably require that a little more of the cluster light dividers be trimmed but I am getting closer to having the it all back together and back in the car.
More this weekend,
Randy
Sunday, October 25, 2015
JUST ANOTHER BUSY SUNDAY
This morning I slept in until 8am, as I had waited for EVTV to load and did not get finished watching it until 3am. Saturday female d-sub connector was made up with the wires coming from the traction and 12 volt batteries, in addition to 12 volt switched power for the instrument panel digital volt/amp meters. The connector just did not turn out good. I can't see, haven't soldered for some time, and was really never good at soldering anyway, so the d-sub connector looked like crap!

D-SUB FEMALE CONNTECOR

FIRST ATTEMPT OF SOLDERING
As you can see, solder flowed onto the flange and I burnt the insulator between the pins. Not real pretty but I guess, it was good practice.
The first thing Sunday morning, a trip was made back to Radio Shack to pick up another d-sub female and also a male connector, as the store I went to Saturday did not have the male. Radio Shack is high for these connectors but I wanted them this weekend and of course, there is not shipping charge if they are picked up in the store. Ok, I had the connectors I needed but also picked up some thinner gauge solder as this should help with the solder overflow onto the connector flange. The second problem I had was my inability to see the little connector where the wire needed to be soldered, so made a trip to Dollar General and picked up some stronger reading glasses to magnify the connector when it is being soldered.

READING GLASSES
It turned out being a beautiful day in central Ohio, so to help with seeing the solder joint, a little work bench was set up on the Better Place box that is sitting outside my garage so I could work in sunlight. To make sure I wasn't missing something, a Youtube vides was watched and I did pick up the tip of putting a spot of solder on the iron first and then putting it on the joint to transfer the heat to the connection. Everything worked, as my second attempt resulted in a much better looking connector.

FEMALE D-SUB CONNECTOR 2ND ATTEMPT
Now onto the male connector inside the car. By now I was getting a little more comfortable making the solder joints and in no time, had all of the connections made.

D-SUB MALE CONNECTOR
So as to keep with the tradition of going out to the garage, falling down drunk and playing with high voltage, a break was taken and I had a couple of Stone Ruinations. Ok, I wasn't falling down drunk but 2 out of 3 ain't bad!

STONE BREWERY RUINATIUS
After my little break, I am going to start reassembling the instrument cluster, so may post later tonight.
Thanks for stopping by,
Randy
Sunday, October 18, 2015
FABRICATING THE MOUNTING FOR THE VOLT/AMP METERS
Saturday my wife and I met my family in Coshocton to go on the Fall Foliage tour. We skipped the last two farms on the tour and went to the Roscoe Village Apple Butter Stirring Festival. That pretty much took up Saturday so no work was done on the Fiero.

ROSCOE APPLE BUTTER STIRRIN'
Sunday morning was chilly but started warming up around 9am, so it was time to start on reworking the instrument cluster to incorporate the Volt/Amp digital meters. Right off the bat, I could not find a socket or nut driver that fit the small screws holding the face plate on, so drove over to Ace Hardware in Baltimore, OH to pick up some tools. Before EVCCON I picked up a 1/4 inch drive metric socket set so after finding out the socket I needed was 7/32 picked up a 1/4 inch drive, inch socket set and some inch nut drivers.
Templates were made for the face plate to mount the meters and the terminal spacing to plug into the existing contact clips that were removed from the instrument cluster that origanally came with the car. The hole locations were transferred to a piece of aluminum sheet metal and were drilled out, then a template was made for the meter and was cut out on the plate with a Dremel cutoff wheel. The plate edges were cleaned up and the meters were tested for fit.

METER MOUNTING PLATE
Then focus turned to making a contact plate so the original contact clips can be used to connect the meters. The holes from the template were transferred to a piece of plexiglas and were drilled out. After another trip to Ace Hardware, brass screws were located in the holes and screwed into place. The contact plate fit like a glove and should work out great.

OLD CLUSTER WITH CONTACTS REMOVED

NEW CLUSTER WITH CONTACTS

STUDS ON BACK OF TEMP AND FUEL GAUGES

CONTACT PLATE

CONTACT PLATE MOUNTED

FACE TEST FITTED
The dual Volt Amp meters are not isolated, so I have to use a 12 volt dc-dc converter to power one of them up to make sure the pack negative is not tied to the 12 volt negative. The leads on the dc-dc converter are very small and require soldering the wires onto them. This can be done but twice not I have had a solder joint fail and the wire come loose, causing the meter not to work, so found a connector that the dc-dc converter will plug into that has connections that you push the wire on to connect them. I believe this will be a much more reliable way to connect the wires to the DC-DC converter and will make the operation of the Volt/Amp meters much more reliable.

DC-DC CONVERTER CONNTCTOR
Next weekend the wiring will be started so I am digging up the instrument cluster schematics and diagrams to find the wires that will need to be spliced to be able to use the original connectors.
More next week,
Randy
Wednesday, October 7, 2015
MOVING FORWARD
Many people have asked me when the Fiero conversion will be done and I always reply "Never, there will always be something that can be improved."
The shift linkage came out of adjustment the last two days in Cape Girardeau and could only be shifted into 1st, 2nd, and reverse. Upon returning home, the linkage was finally able to be adjusted to go into all four gears.

SHIFT CABLE ADJUSTMENT
My next project is to replace the ignition switch, as the switched power going to the traction pack meter stays on when the key is turned off sometimes. A new switch was purchased from Parts Geek and arrived on Monday.

NEW IGNITION SWITCH
Since the steering column has to be dropped to install the new ignition switch, I figure it would be a good time to install the new instrument cluster. The circuit board on the old one is broken in a couple places and the dash lights on the speedometer side do not come on. The circuit board and connections on the new cluster look to be in very good condition and will hopefully fix this problem.

NEW (USED) INSTRUMENT CLUSTER
The seals also need replaced in my wife's SLK230 power top cylinders, so I have quite a bit of work on my plate that will need to be shared with working on the Fiero, not to mention a little paint trim work in the bathroom and kitchen. It would be nice to just focus on the Fiero but as the saying goes "A happy wife makes for a happy life," so I guess these other projects will just need to be worked in!
Until next time,
Randy
Saturday, October 3, 2015
EVCCON 2015 WRAP UP
Michael Brown, a retired IBM employee, now residing in Thailand, made Cape Girardeau and EVCCON a stop on his world tour this year. Every year I go to EVCCON with the intention of doing daily blog posts about the event but have always found that others have already done write ups and that there is really no need to duplicate their efforts. Below are Mike's daily blog posts covering this year's event:

EVCCON 2015 Day -1

EVCCON 2015 - Day 0

EVCCON 2015 - Day 1

EVCCON 2015 - Day 2

EVCCON 2015 - Day 3

FINAL EVCCON 2015 WHISKEY TOAST
A special thanks to Brian Couchane for the ride to and from EVCCON for me and the Fiero! Brian is always lending a hand to other EVers and even brought his generator all the way from Ohio it the back of his truck, so those drag racing at Dyno Dom's in Siskin, MO would be able to charge between runs. Again many thanks Brian!
Also the help getting the vacuum leak on my brake line fixed by Aaron Lephart and his father was greatly appreciated. They went to the local NAPA and picked up some different clamps while I finished breakfast and would not even accept any payment for them. I appreciate the help guys and look forward to seeing you next year!
The week always goes so fast and I sit here in my hotel room wishing that I was getting up tomorrow and going to another session filled day at the EVTV garage instead of loading up the car and heading home but I guess that will just need to wait until next year!
To another Great EVCCON,
Randy
Thursday, October 1, 2015
WHERE IT ALL BEGAN
In May of 2009, while searching the internet for alternate fuel vehicles, I came across a video done by Jack Rickard of Cape Girardeau, MO, that featured a 1957 Porsche 356 Speedster replica, electric conversion. At the bidding of Jack's then partner, Brian Noto, weekly EVTV Shows started being produced by June of that year. Needless to say, I was hooked and started attending the yearly Electric Vehicle Conversion Convention (EVCCON) from that year until now. This year the weather cooperated and a barbecue was finally held at Jack Rickard's home, overlooking the Mississippi, River; The location of the original weekly video productions.

The ORIGINAL EVTV GARAGE
So when when I walked into the driveway from the fire pit and saw the door of the garage open, it took me back to the the beginning of the EVTV weekly show , the source of the many great memories I have of past EVCCONS and of most of the knowledge I have gained about electric cars, over the last 6 years.

THE ORIGINAL EVTV GARAGE

INSIDE THE ORIGINAL EVTV GARAGE

JACK'S STILL
There were many absent from EVCCON, renamed The EVTV Open House this year but for me and a group of die hards, we got a real trip down memory lane!
My dream was always to be able to bring a car to the show and life is short, so you never really know if you will ever be in Cape Girardeau again, but this year my dream came true!
Long live your dreams,
Randy
Monday, September 28, 2015
VACUUM PUMP CLAMP CLEAN UP
This morning the clamps on the vacuum pump were replaced to hopefully give it a little cleaner look. Nothing functional but it does look better. Eventually a small vacuum tank will be added but doesn't seem to be necessary as the pump provides plenty of vacuum and does not seem to motor boat.
 |
BEFORE |

AFTER
Final preparations to tow the car still have not been made and I am a little worried, as Brian's company works with some major manufactures and if the right deal happened to be closing, could cause major changes in the EVTV Open House plans. Another local EV enthusiast offered a ride to Missouri, but after four years of sweating over the Fiero, really had my heart set on taking it to Cape Girardeau.
All my cloths are packed and in the Fiero so will just need to pack up the laptop, camera and all of the chargers to be ready to head out. Hopefully my next post will be from the EVTV Garage.
Randy
Subscribe to:
Comments (Atom)