After discharging the lowest cell down to 2.7, the module was rested for 2 weeks and today all of the cell voltages were read again. All of the voltages had drifted back up to around 3 volts with the highest being 3.096 and the lowest, 2.068 volts. The lowest half cell shifted from #5 to #9. The two flood lights were hooked up and the lowest half cell was taken down to 2.5 volts. Then the 40 watt bulb was connected and the voltage started increasing again. Once the voltage stabilizes, the 4 watt night light will be connected and the voltage drained until the lowest half cell is down to 2.5 again. Hopefully after a couple weeks rest, all of the half cells will be below 3 volts and I can start charging all of them up to 3 volts. This is kind of like top balancing the bottom and seems to work best to get them to all level out at the same voltage. Jack Rickard at EVTV reported that he was using 3 volts as his bottom balance voltage but this is before his module caught on fire, so I may check with him to find out what voltage he is using now.
Until next time,
Randy
Showing posts with label electric fiero. Show all posts
Showing posts with label electric fiero. Show all posts
Sunday, March 20, 2016


Monday, February 1, 2016
Sunday, January 10, 2016
FIRST SNOW
This winter has been unseasonably warm so far and last week the temperature reached 50 deg one day but finally Old Man Winter is catching up with us!

FINALLY, SNOW IN CENTRAL OHIO
With the holidays, not much progress has been made on getting the voltage and amp meters finished and the interior put back together on the Fiero but today, new splash shields were ordered from the Fiero Store, for the engine compartment.

ENGINE COMPARTMENT SPLASH SHIELDS
A bluetooth keyboard and mouse were purchased for the Dell Venue 8 Pro, so while the center console is out of the car, may change the tablet mounting so the keyboard can be incorporated and also to raise the tablet high enough so the camera will clear the dash to get video of drives.

BLUETOOTH KEYBOARD AND MOUSE
The garage is cold, so I have been spending most of my time working on getting parts and developing a plan for work on the Fiero when the weather breaks. Below is a picture of me sitting by the computer with my build assistants Apollo (cat) and Chloe (dog.)

ME AND MY BUILD ASSISTANTS
Thanks for visiting,
Randy
Thursday, December 31, 2015
2015 BUILD REVIEW (SECOND HALF OF THE YEAR)
By the middle of August, the battery modules had been matched and connected together in parallel. In addition, a TCCH PFC-3000 charger was installed and the car was driven fellow EV builder, Brian Couchene's house, the longest distance the car had been driven to date. Brian's father was visiting, so we took a ride up and down the hilly roads nearby . The Fiero was actually able to climb the steep grades in fourth gear, which was very impressive.


08/02/15
By the beginning of September the Fiero was pretty much ready to take to EVCCON, the plastic side trim and lower bumpers were sanded and painted satin black, and the car was professionally detailed.


NOVEMBER 29, 2015


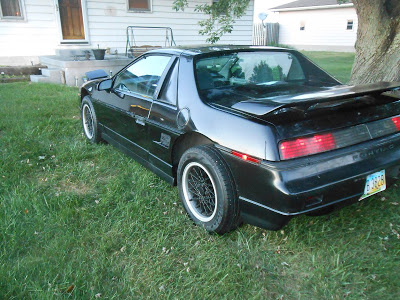
SEPTEMBER 9, 2015
Shifting was still erratic, so a set of new bushings were ordered for the shift lever from Rodney Dickman. The instructions clearly stated to be careful not to break the aluminum shift bracket but the pin would not budge and finally when I thought it did, found that the shift bracket had snapped. This was not good, with only a few weeks until EVCCON the transaxle could not be shifted. I got on Thumb Tack, found a couple of welders in my area and finally talked one of them into welding the shift bracket on short notice. The job was a very professional and sturdy fix, so i was able to get the shift linkage hooked back up. The new bushings took the play out of the shift bracket but shifting was still erratic and seemed to come out of adjustment after a few shifts.

SEPTEMBER 16, 2015
The last improvement made before EVCCON was a new vacuum pump. The one that came with the car was very noisy but I found a smaller one that is rather quite and operates the power breaks just fine.

SEPTEMBER 21, 2015
A week before EVCCON, Jack Rickard announced it was canceled this year because he could not secure insurance for the venue. Shortly after the announcement, it was announced that there would still be an open house at the EVTV Garage for anyone interested in still making the journey. Tuesday morning, September 29, 2015, Brian Couchene arrived at my house with his tow dolly, the Fiero was loaded, and we were off to EVCCON!

SEPTEMBER 30, 2015
Upon returning home from EVCCON, I went to work on all of the problems that turned up from driving the Fiero around Cape Girardeau for a week. The right side instrument lights were not lighting up and the 12 volt digital meter in the instrument panel quit working so a new instrument cluster was purchased, along with a new ignition switch.


OCTOBER 7, 2015
By the end of November, the instrument cluster was finally rewired using a D-Sub connector for the digital volt/amp meter wiring, and was ready to be installed in the Fiero. The steering column had been dropped and the new ignition switch was installed.


By the beginning of December, the instrument panel was back in the car with the lights and meters working.


DECEMBER 13, 2015
So this is pretty much the year in review, pretty much right back where I started. With the weather finally turning cold, there will probably not be much more progress until spring. The guys at work are wanting to see the car but I do not want to chance driving it into Columbus, OH until the third module is installed, just in case I am not able to charge at work. While the interior is torn apart again, I will remove the passenger seat to paint the frame work and to pull off the interior panel so the light switch on the door can be replaced.
Thanks for visiting my blog this year!
Randy
2015 BUILD REVIEW (FIRST HALF OF THE YEAR)
It is ironic that 2015 started with wiring the console and actually ended with that also. After you start driving the conversion, you always find things that you are not satisfied with and end up having to go back and rework them. I guess this goes back to your original engineering and planning, so this will go down as a lesson learned for future builds.

JANUARY 3, 2015
By the end of March, the interior was finally back together and actually turned out pretty good. The heater controls were wired to be able to turn the heat on and off with the temperature slider, the Venue 8 Pro tablet was mounted to be able to view the Synkromotive Motor Controller user interface, and all of the meters were reading properly.

MARCH 29, 2015
By early May, I had installed LED dome, instrument and headlight lamps to help cut the power required to drive at night and I must say, was rather impressed with the LED headlamps.

MAY 9, 2015
By the middle of May, the Fiero could be driven and with one of the Better Place modules, had around a 25 mile range using 251 watt hours/mile.

MAY 12, 2015
As a precaution, a JLD 5740 meter and ABB contactor were installed to be able to disconnect the 240 volt AC power to the charger when the charge reached a predetermined level. This was just to give me a little piece of mind that if the charger control did not turn off or tried to float charge, the ac power would be cut off to it.


MAY 31, 2015
Side panels and a floor were fabricated to enclose the front trunk compartment and the second module was modified and mounted in the front of the car before conduit was mounted under the car to protect the power cables. The second module was finally installed, effectively giving me a 50 mile range.


JULY 31, 2015
Wednesday, October 28, 2015
MOUNTING THE D-SUB CONNECTOR
Since the 12 volt DC-DC converter quit working, another two were ordered from Light Object. While waiting on them to arrive on Friday, I decided to work on mounting the d-sub connector. As the metal on a computer where these connectors are usually mounted is much thinner than the plastic case of the instrument, they would not mount up with the coupling nuts that are typically used. The female connector had to be mounted to the outside of the housing and the holes on it, had to be threaded to 6-32 threads. Then 6-32 studs had to be made from some small brass bolts to screw into the connector holes with nuts installed on the inside of the housing. This should give me a solid mounting of the female half of the connector and will allow me to plug the male half in and then fasten it with two more screws on the outside of the housing.

TYPICAL D-SUB STANDOFF

OUTSIDE OF THE CASE VIEW

INSIDE OF CASE VIEW
The addition of the screws on the inside of the case will probably require that a little more of the cluster light dividers be trimmed but I am getting closer to having the it all back together and back in the car.
More this weekend,
Randy
Saturday, October 3, 2015
EVCCON 2015 WRAP UP
Michael Brown, a retired IBM employee, now residing in Thailand, made Cape Girardeau and EVCCON a stop on his world tour this year. Every year I go to EVCCON with the intention of doing daily blog posts about the event but have always found that others have already done write ups and that there is really no need to duplicate their efforts. Below are Mike's daily blog posts covering this year's event:

EVCCON 2015 Day -1

EVCCON 2015 - Day 0

EVCCON 2015 - Day 1

EVCCON 2015 - Day 2

EVCCON 2015 - Day 3

FINAL EVCCON 2015 WHISKEY TOAST
A special thanks to Brian Couchane for the ride to and from EVCCON for me and the Fiero! Brian is always lending a hand to other EVers and even brought his generator all the way from Ohio it the back of his truck, so those drag racing at Dyno Dom's in Siskin, MO would be able to charge between runs. Again many thanks Brian!
Also the help getting the vacuum leak on my brake line fixed by Aaron Lephart and his father was greatly appreciated. They went to the local NAPA and picked up some different clamps while I finished breakfast and would not even accept any payment for them. I appreciate the help guys and look forward to seeing you next year!
The week always goes so fast and I sit here in my hotel room wishing that I was getting up tomorrow and going to another session filled day at the EVTV garage instead of loading up the car and heading home but I guess that will just need to wait until next year!
To another Great EVCCON,
Randy
Thursday, August 6, 2015
MATCHING MODULES
Today was pretty eventful, as the 1998 Mercedes Benz SLK Class 2 door convertible hardtop with 0nly 34000 miles was being delivered. A half day off work was taken but really was not needed, as the car did not arrive until 7:30 pm.

MERCEDES BENZ SLK CLASS
Since I was off and just waiting for the car to be delivered, I decided to start hooking up the front battery module. The cables in the front had to be trimmed and the connectors needed to be drilled so they would go over a 3/8 in stud. Once they were drilled, the cable was prepared and they were crimped onto the cable. Heat shrink covered the connection and insulating boots were pushed over the cable. Voltage readings were taken on the front and rear modules and they were very close to the same voltage.

FRONT MODULE CONNECTION

FRONT MODULE IS 123.0 VOLTS

FRONT MODULE IS 123.1 VOLTS
Since the modules were only .1 volt apart, I took a pair of needle nose and placed the last cell connector on the battery terminals and started the bolts. When I tightened up the bolts there was a slight spark and the modules were connected.

LAST CONNECTION MADE
Then, just to make sure both the modules were working properly, a drive was taken to the Marathon Convenience Store to pick up a 6 pack of Big Vic Imperial IPA. I felt a little celebration was in order, as this had been a busy day. The car ran fine and it will be interesting to do the first charge with both modules connected and then to do a little range testing.
Until next post,
Randy
Sunday, August 2, 2015
ALL DONE BUT FINISHING
This morning stated with another trip to Ace Hardware at 8 am but when I arrived, the store did not open until 9 on Sundays. No problem, as I just drove back to Flying J, by the interstate to get the car gassed up and to pick up a breakfast sandwich and coffee before driving back to the hardware store to wait for it to open. After finally getting in the store I picked up some 3/4 inch conduit clamps and looked around to try and find some kind of bushing to run the conduit through the front plate. After going through the electrical section, I finally went back to the pipe section and found an 1-1/4 inch pipe bushing that the conduit fit through, then back to the electrical section to get a couple of nipple nuts.

1-1/4 INCH PIPE BUSHING
After arriving back home it was time to climb back under the Fiero to finish running the conduit.

FIERO IN THE AIR
The conduit clamps were changed out from 1 inch to 3/4 inch first then the first hole was drilled in the front plate. The only 1-1/4 inch hole saw I had was actually for wood and not metal, so by the time I was finished, sparks were flying and there were no teeth left on the hole saw but I was far enough through to take a hammer and get the metal disk to pop out. The conduit was run through the new bushing and a final fit cut was made. The cable was pushed through the conduit, fed up into the front compartment of the car, and the gland nut was tightened around the conduit. Great, one side done and only one to go, so another trip was made to ACE Hardware to pick up another 1-1/4 inch hole saw. Upon returning, the other hole was drilled and the positive cable was run up into the front compartment to finish the job.

CONDUIT RUNNING INTO FRONT COMPARTMENT

1-1/4 INCH PVC PIPE BUSHINGS

ALL DONE !
Just taking a short break and having a cold PBR, then back to work!
More this evening,
Randy
Saturday, August 1, 2015
I'M BEAT,,,,CONDUIT ANYMORE TODAY
Ok, I have been crawling under the Fiero all day, drilling and tapping holes so I just can't do it (conduit) anymore today. The morning started out by driving to Ace, Millersport Hardware, and finally Home Depot to try and find Unistrut. Once I got home, I crawled under the car to take measurements but decided that the existing hangers that are being used will work fine if they are clamping onto the conduit instead of directly on the cable, so I came back out from under the car and went to work on trying to get the last conduit gland out from behind the battery. This involved putting some cardboard over the top of the rear battery connections and climbing back as far as possible so the conduit gland could be accessed. I put some needle nose vice grips on the flange and tried to move it but it was solid. Back under the car with a hammer to use to try and tap it up through the hole. When I went to tap it I found that the two holes were empty and the conduit gland that would not come out still had the nut on it. So after using a screw driver and hammer to loosen the nut, went back up topside but the conduit gland would still not come out because it was wedged by the negative battery cable that goes to the controller. After taking a long screw driver and prying the cable a little, the gland finally was free and could be removed.
Back under the car to look for a new location that was accessible, to put the conduit glands. After finally finding a good location, I crawled back out to get the drill, hole saw, conduit glands, and a punch to center punch the plate so the drill bit wouldn't drift. The holes I put in the front deck plate seemed too large, as it seems the hole saw actually drills a larger hole than it's diameter, so this time I went with a smaller hole saw. Before the first hole was drilled, the batteries started running down, so had to go real show to finally get the hole saw through. After drilling the hole I found that the plate I drilled had another plate coming in at an angle behind it, that would make getting the nut on the nipple hard and the cable gland nipple would not quite go through the hole. Again, off to Ace Hardware to get a 3/4 pipe tap, as tapping the hole would solve both problems. While I was getting the tap, the drill battery was put on the charger, so back under the car to drill the second hole and tap both of them. The fresh batteries did the trick and the tapped holes worked like a charm.

CORDLESS DRILL AND HOLE SAW

3/4 IN TAP
Then the conduit was pressed in the rear conduit glands and run through the existing hangers. The hangers were a little too big, so I must have purchased 1 in instead of the 3/4 in that is needed. Also, two more holes will need to be drilled to run the conduit under the new deck plate where the front conduit glands come through. The conduit was left a little long for the final fit. after it is run through the new holes and in the morning, it will be off to Ames hardware again to get some fitting for the new holes.

CONDUIT RUN TO REAR OF CAR

FRONT OF CAR TO PLATE THAT NEEDS DRILLED
By then I was beat, so after sitting on the porch and having a nice cold Pabst Blue Ribbion Beer, it was time to take a short nap before taking my wife the the QFM 96 radio station Food Truck Fest.

PBR BEER

QFM 96 RADIO STATION FOOD TRUCK FEST

FOOD TRUCKS!
Last month the Fiero EV Build Blog had the most page views ever, so I thank all of you for visiting!

PAGE VIEWS
Continued tomorrow,
Randy
Subscribe to:
Posts (Atom)